USERS

ECHO User Manual
USERS
There are a total of 10 users that can be installed at any time (administrator + 9 users). User 0 (Administrator) is factory preset and has administrative rights to the system. User 0 can not be deleted. User 1 through User 9 can be installed as needed, with various permission levels (see below).
PIN CODES
User PIN code lengths are preset at the factory and are not changeable at the site level. You will be given specific information for your site at the time of installation. Default / standard PIN code lengths are 6 digits.
LOGGING IN
- to “log in” to the system, you will be required to enter your PIN code. This is required to perform most system functions.
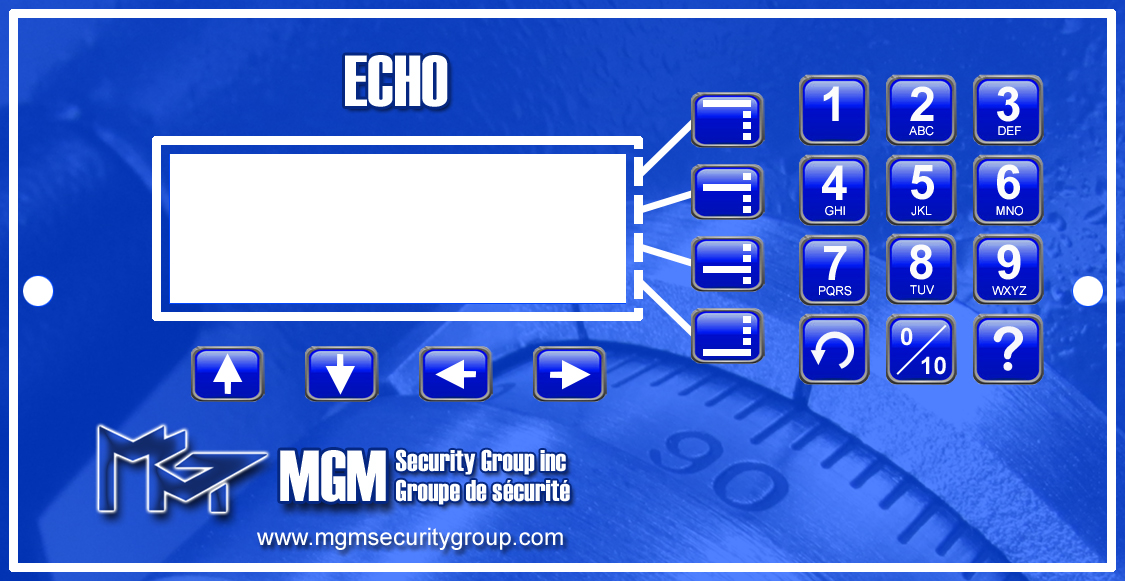
- press the MENU button (MENU 4)
- ENTER PIN is displayed any time you are required to log in (ie. after pressing VEND or MENU)
- When entering PIN codes, the * (Asterisk) character will be displayed, for each digit entered, to mask your PIN, while giving visual feedback on the number of digits entered. There is no “enter” key needed – upon entering the required number of digits, your PIN code will be accepted and processed. If you make a mistake during PIN code entry, use the LEFT ARROW key to backspace the required number of digits and continue entering your PIN code.
- if the entered PIN code is not recognized, the message INCORRECT PIN will be displayed and you will be returned to the ENTER PIN screen. Enter your PIN code slowly and accurately.
NOTE: after 4 “INCORRECT PIN” messages, the system will enter LOCKOUT MODE and display the message NO ACCESS with a running timer. No system functions may be performed during this time. The lockout time is factory preset and can not be changed at the site level. You will be given specific information for your site at the time of installation. The default / standard lockout time is 5 minutes. A valid PIN code entry will reset this count to zero.
CHANGING PIN CODES
Changing PIN codes can be done in 2 ways; 1) by the user of the PIN code and 2) by a user with EDIT USER permissions (ASSISTANT MANAGER and above – see “User Permission Levels”).
NOTE: PIN codes are not recoverable by any user. If a PIN code is lost by a user, the PIN code must be reset by a user with appropriate permissions.
CHANGING PIN CODES – USER LEVEL
- log in to the menu system (see “logging in”)
- select “ADMINISTRATION”
- select “CHANGE PIN”
- the NEW PIN entry screen will appear. Enter a new PIN code (the * character will be displayed as you enter the PIN code). After entering the PIN code, “CONFIRM” will appear. Enter the SAME PIN CODE AGAIN to confirm your entry.
- after entering the PIN code for the second time, the system will save the new PIN code, which is now ready for use.
CHANGING PIN CODES – ADMINISTRATION LEVEL
- log in to the menu system (see “logging in”)
- select “ADMINISTRATION”
- select “USERS”
- select “EDIT USER”
- enter the USER ID you wish to EDIT (01 – 09)
- press the “DONE” menu button until the USER PIN screen appears. Enter a PIN for the user (the * character will be displayed as you enter the PIN). After entering the PIN, “CONFIRM” will appear. Enter the SAME PIN AGAIN to confirm your entry.
- after entering the PIN for the second time, the system will save the new user information, which is now ready for use.
USER PERMISSION LEVELS
User permission levels may be assigned to individual users, which restrict access to various system functions. They are defined as follows;
ADMINISTRATOR
- top level user
- has the ability to access all site level functions
NOTE: this user can not be deleted, or modified by any other user. If the PIN code for this user is lost, please contact the technical support department.
MANAGER
- manage users (add / edit / delete)
- open outer door
- load / unload coin dispenser
- coin dispenser vend
- coin dispenser tube count
- bill validation
- manual drops
- change own PIN
- print user reports (shift, enrolled users)
- print cash reports (cash, grand-x, grand-z)
- adjust time
- change system language
ASSISTANT MANAGER
- manage users (edit / delete)
- open outer door
- load / unload coin dispenser
- coin dispenser vend
- coin dispenser tube count
- bill validation
- manual drops
- change own PIN
- print user reports (shift, enrolled users)
- print cash reports (cash, grand-x)
SHIFT LEADER
- open outer door
- load / unload coin dispenser
- coin dispenser vend
- coin dispenser tube count
- bill validation
- manual drops
- change own PIN
- print user reports (shift)
- print cash reports (cash)
OPERATOR
- coin dispenser vend
- coin dispenser tube count
- bill validation
- manual drops
- change own PIN
- print own shift report
USER STATUS
The following indicate the status of any user, which is available when adding / editing a user, as well as within the “Enrolled Users Report”;
ACTIVE
- the user is active and may initiate all functions, as permitted by the user’s permission level
DELETED (AVAILABLE)
- the user is not installed and is available for new users
SUSPENDED
- the user is installed, but may not perform any functions until the user’s status is returned to the active status.
NOTE: this can be used for situations such as employee holidays. The user is to be away for an extended period of time (ie. 2 week holiday, maternity leave, etc.) and is SUSPENDED to prevent unauthorized use of the user’s account
MANAGING USERS
ADDING USERS
- log in to the menu system (see “logging in”)
- select ADMINISTRATION
- select USERS
- select ADD USER
- enter the USER ID you wish to ADD (01 – 09)
- if the user is available, the USER NAME screen will appear. You may use the directional arrow keys to edit the displayed name. Left and right arrows move the cursor, while the up and down arrow keys scroll through the character set. Available characters are A-Z, 0-9 and space. Press DONE when complete to continue.
the USER LEVEL screen will appear. Press MENU BUTTON 3 (an arrow is shown to indicate the button is active) to scroll through the user permission levels. Press DONE when complete to continue. - the USER PIN screen will appear. Enter a PIN for the user (the * character will be displayed as you enter the PIN). After entering the PIN, CONFIRM will appear. Enter the SAME PIN AGAIN to confirm your entry.
after entering the PIN for the second time, the system will save the new user information, which is now ready for use.
NOTE: adding a new user clears all data for the user (ie. Bills in, coin dispensed, etc.). It is NOT RECOMMENDED to edit an existing user to avoid deleting and re-adding a user as the previous user’s data will be retained, resulting in incorrect data.
MODIFYING USERS
- log in to the menu system (see “logging in”)
- select ADMINISTRATION
- select USERS
- select EDIT USER
- enter the USER ID you wish to EDIT (01 – 09)
- if the user is not found, you will be asked if you wish to ADD this user (see above). If the user is found, the USER NAME screen will appear. You may use the directional arrow keys to edit the displayed name. Left and right arrows move the cursor, while the up and down arrow keys scroll through the character set. Available characters are A-Z, 0-9 and space. Press DONE when complete to continue.
- the USER LEVEL screen will appear. Press MENU BUTTON 3 (an arrow is shown to indicate the button is active) to scroll through the user permission levels. Press DONE when complete to continue.
- the USER STATUS screen will appear. Press MENU BUTTON 3 (an arrow is shown to indicate the button is active) to scroll through the user status (see “User Status”). Press DONE when complete to continue.
- the USER PIN screen will appear. If you do not wish to change the user’s PIN, simply press the DONE key to continue. Otherwise, enter a new PIN for the user (the * character will be displayed as you enter the PIN)
- After entering the new PIN, CONFIRM will appear. Enter the SAME PIN AGAIN to confirm your entry.
- after entering the PIN for the second time, the system will save the modified user information.
NOTE: when editing the permission level of a user, it can NOT be set greater than the permission level of the user adding the new user. (ie. an ASSISTANT MANAGER can promote an OPERATOR (or SHIFT LEADER) to ASSISTANT MANAGER, but can not assign a MANAGER permissions level.
NOTE: users can NOT edit users with greater permission levels (ie. ASSISTANT MANAGER can not edit a MANAGER)
DELETING USERS
- log in to the menu system (see “logging in”)
- select ADMINISTRATION
- select USERS
- select EDIT USER
- enter the USER ID you wish to EDIT (01 – 09)
- if the user is not found, you will be asked if you wish to ADD this user (see above). If the user is found, the USER NAME screen will appear. Press DONE to continue.
- the USER LEVEL screen will appear. Press DONE to continue.
- the USER STATUS screen will appear. Press MENU BUTTON 3 (an arrow is shown to indicate the button is active) to scroll through the user status until DELETE is selected. Press DONE when complete to continue.
- a confirmation screen will appear asking you to confirm your request to delete the specified user. Press YES to continue, or NO to cancel (MENU BUTTONS 3 & 4 respectively).
- the selected user will be deleted and become available to add a new user.